For WSD Print enable the toggle button. Open the devices and printers screen.
Installing To Use Wsd Canon Printer Driver Installation Guide Installation Guide
On the left side of the window select Network.
. Disable every protocol on the printer except SNMP and 9100. Print a network status sheet so you can identify the network name and model name for your product on the network. Press the home button if necessary.
Set printer hostname Or just note it down MMC Console. The second and final test is the Resolve WS-Discovery operation based on the device WSD ID. I have also started turning off the option in Windows to automatically install these devices since you end up with 2 copies of the same printer one from your proper install and one of these will stop working sooner than later WSD installs.
1 Turn off WSD at the device. Select PC then press the OK button. Click start and then click Network on the computer.
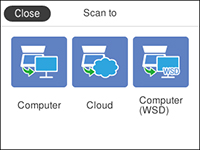
Use the button to select the computer to forward the scanned data then press the OK button. Computer and then Network. To perform scanning select in the Home screen and specify a WSD-connected computer as a scan destination Scanning and Saving to a.
This runs the WSDDPWS logo tests This job requires 1 machine as well as the DeviceID for the device that is being tested. But we aint wizards. - Document is scanned successfully.
Press the home button if necessary. Select the Start icon. Click Continue when the User Account Control.
That wasnt supposed to happen. The scanned image is transferred to the selected computer. Click start and then click Network on the computer.
Heres what I do for printer installs. How do I set up scan to computer. X Windows 7 or Windows Vista English only.
Setting Up and Connecting from Computer by WSD Port for Windows Only Turn the printer on. Click or Start and select Computer. Make sure that the machine is turned on.
The screen for selecting to which you save the data is displayed. Click Print Mode then select an option. Press or several times to select Admin Setup.
WSD is listed in most printersMFDs under Network Settings. Click Start and then click Network on the computer. Open the devices and printers screen.
To set up the printerscanner with WSD the computer and printer must be connected to the network. I wouldnt hold out much hope for getting that to work in Windows 10. This section explains how to set up the network-connected printer using WSD.
If you are connected to a Fiery Server with FS150150Pro you can find settings mentioned in this procedure in Job Submission Web Services for Devices SWD instead. Even when the printer IP doesnt change or is static assigned it still will just stop working. Select Add printer at the top 3.
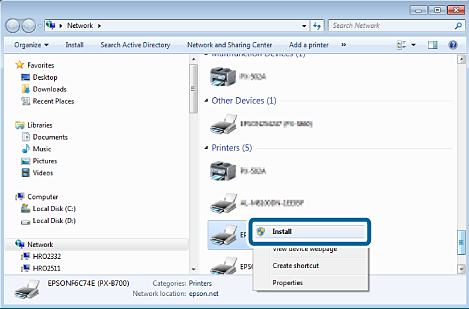
If nothing shows up select the blue link at the bottom the printer that I want isnt listed 4. Locate your product on the Network screen right-click it and select Install. Click Continue in the User Account Control dialog box.
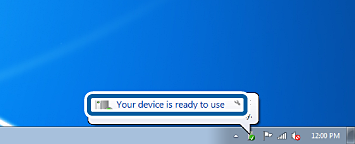
The following are necessary for setting up the WSD port. Click Your device is ready to use. Try to use the device manager to add it.
If WSD refers to something else please let us know what you mean. What does to computer WSD mean. Setting Up and Connecting from Computer by WSD Port for Windows Only Turn the printer on.
Click Continue in the User Account Control dialog box. In the Protocols area click WSD Web Services on Devices. Scanning Using Web Services for Devices WSD Windows Make sure you installed the product software and connected the product to your computer or network.
The printer and computer are connected to the network. To Computer WSD lets you manage network scanning in Windows 10 Windows 8. Print Server Ports Add Port Standard TCPIP Port Use the hostname as the port Next.
The icon shows the network printer name eg EPSONXXXXXX. To use this feature you must first set up WSD Web Services for Devices on the computer. To set a binding position for duplex scanning with Scan To Computer and Remote Scan via WSD Scan follow the procedure below.
Settings Dialog Box. For Port Number type a port number or TCPIP socket number. Use Computer Scanning Select the check box to use WSD scanning by operating the machine with the operation panel.
Verify that the printer is turned on. Test details Additional documentation Tests in this feature area might have additional documentation including prerequisites setup and troubleshooting information that can be found in the following topic s. Click TBCP Filter then select Enabled or Disabled.
To use this feature you must first set up a WSD Web Services for Devices port on your Windows 7 or Windows Vista computer the port is set up automatically on Windows 10 and Windows 8. Right-click the printer and then click Install. This check box can only be selected when the Use WSD Scanning check box is selected.
Turn on the printer. The printer supports Windows Vista Web Services on Devices WSD. For PJL enable the toggle button.
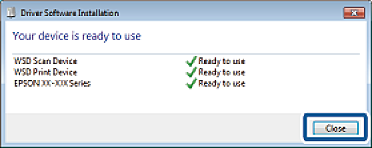
If you are manually installing the driver the screen below shows the setting you should choose. Both test cases will timeout if the device does not respond within 60 seconds. Check the message and then click Close.
This is the best way to prevent Web Service Devices from installing on your PC. Related tasks Scanning to a Network Folder or FTP Server. Click the Start button then Network.
Click Your device is ready to use. From Configure choose Network Services WSD. 2 Dont use Auto Detect when installing the print driver.
Right-click the printer and then click Install. Click Start and then Network. Press Device Settings on the touch panel.
Choose the default print connection. Follow the instructions in the links below to complete your scan. Select Scan on the HOME screen.
The test first performs the Probe WS-Discovery operation filtered by ScanDeviceType. Apply or save your changes. Right click the installed MFP then select Start Scan - Configure the correct settings if its required then scan a document.
The printer driver is installed on the computer. Right-click the printer and then click Install. Place your original on the product for scanning.
Setting Up a WSD Port Windows 7Windows Vista Turn on your product. WSD was designed for Windows XP Windows Vista and Windows 7. Make sure you installed the product software and connected the product to your computer or network.
Right-click the printer icon then click Install. For WS-Scan details visit Scan Service WS-Scan Schema. Place your original on the product for scanning.
Select the Start icon. If thats the case youll have to ask Epson for help. Check the message and then click Close.
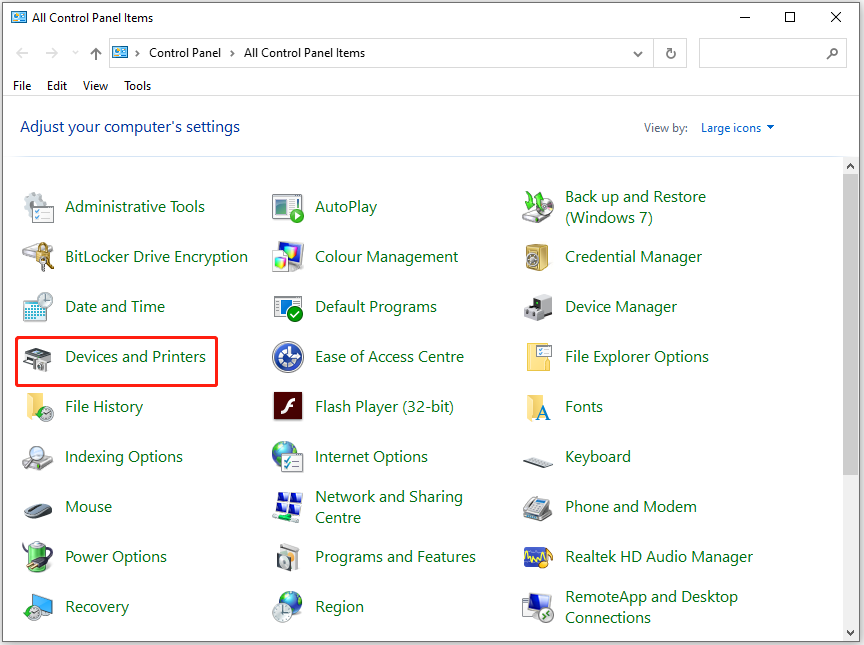
1Enter devices and printers into the Windows 10 search bar 2. Computer WSD lets you manage network scanning in Windows 10 Windows 8x Windows 7 or Windows Vista English only. LCD and Operation Panel.
Right-click the printer icon then click Install. Install WSD scanner MFP to Windows 10 from Devices and Printers - Add a Device.
What Is The Wsd Port And How To Set Up Connect It
Setting Up And Connecting From Computer By Wsd Port For Windows Only
How Do I Connect The Computer To My Printer Using Both The Infrastructure Mode And The Wireless Direct Mode Brother

My Passion Wakes Me Up In 2022 Wake Me Up Wake Me Passion
Scanning Using Web Services For Devices Wsd Windows
Setting Up And Connecting From Computer By Wsd Port For Windows Only

Installing The Printer Driver To Print Using The Wsd Port User Guide Im C530 Series
Setting Up And Connecting From Computer By Wsd Port For Windows Only
0 comments
Post a Comment